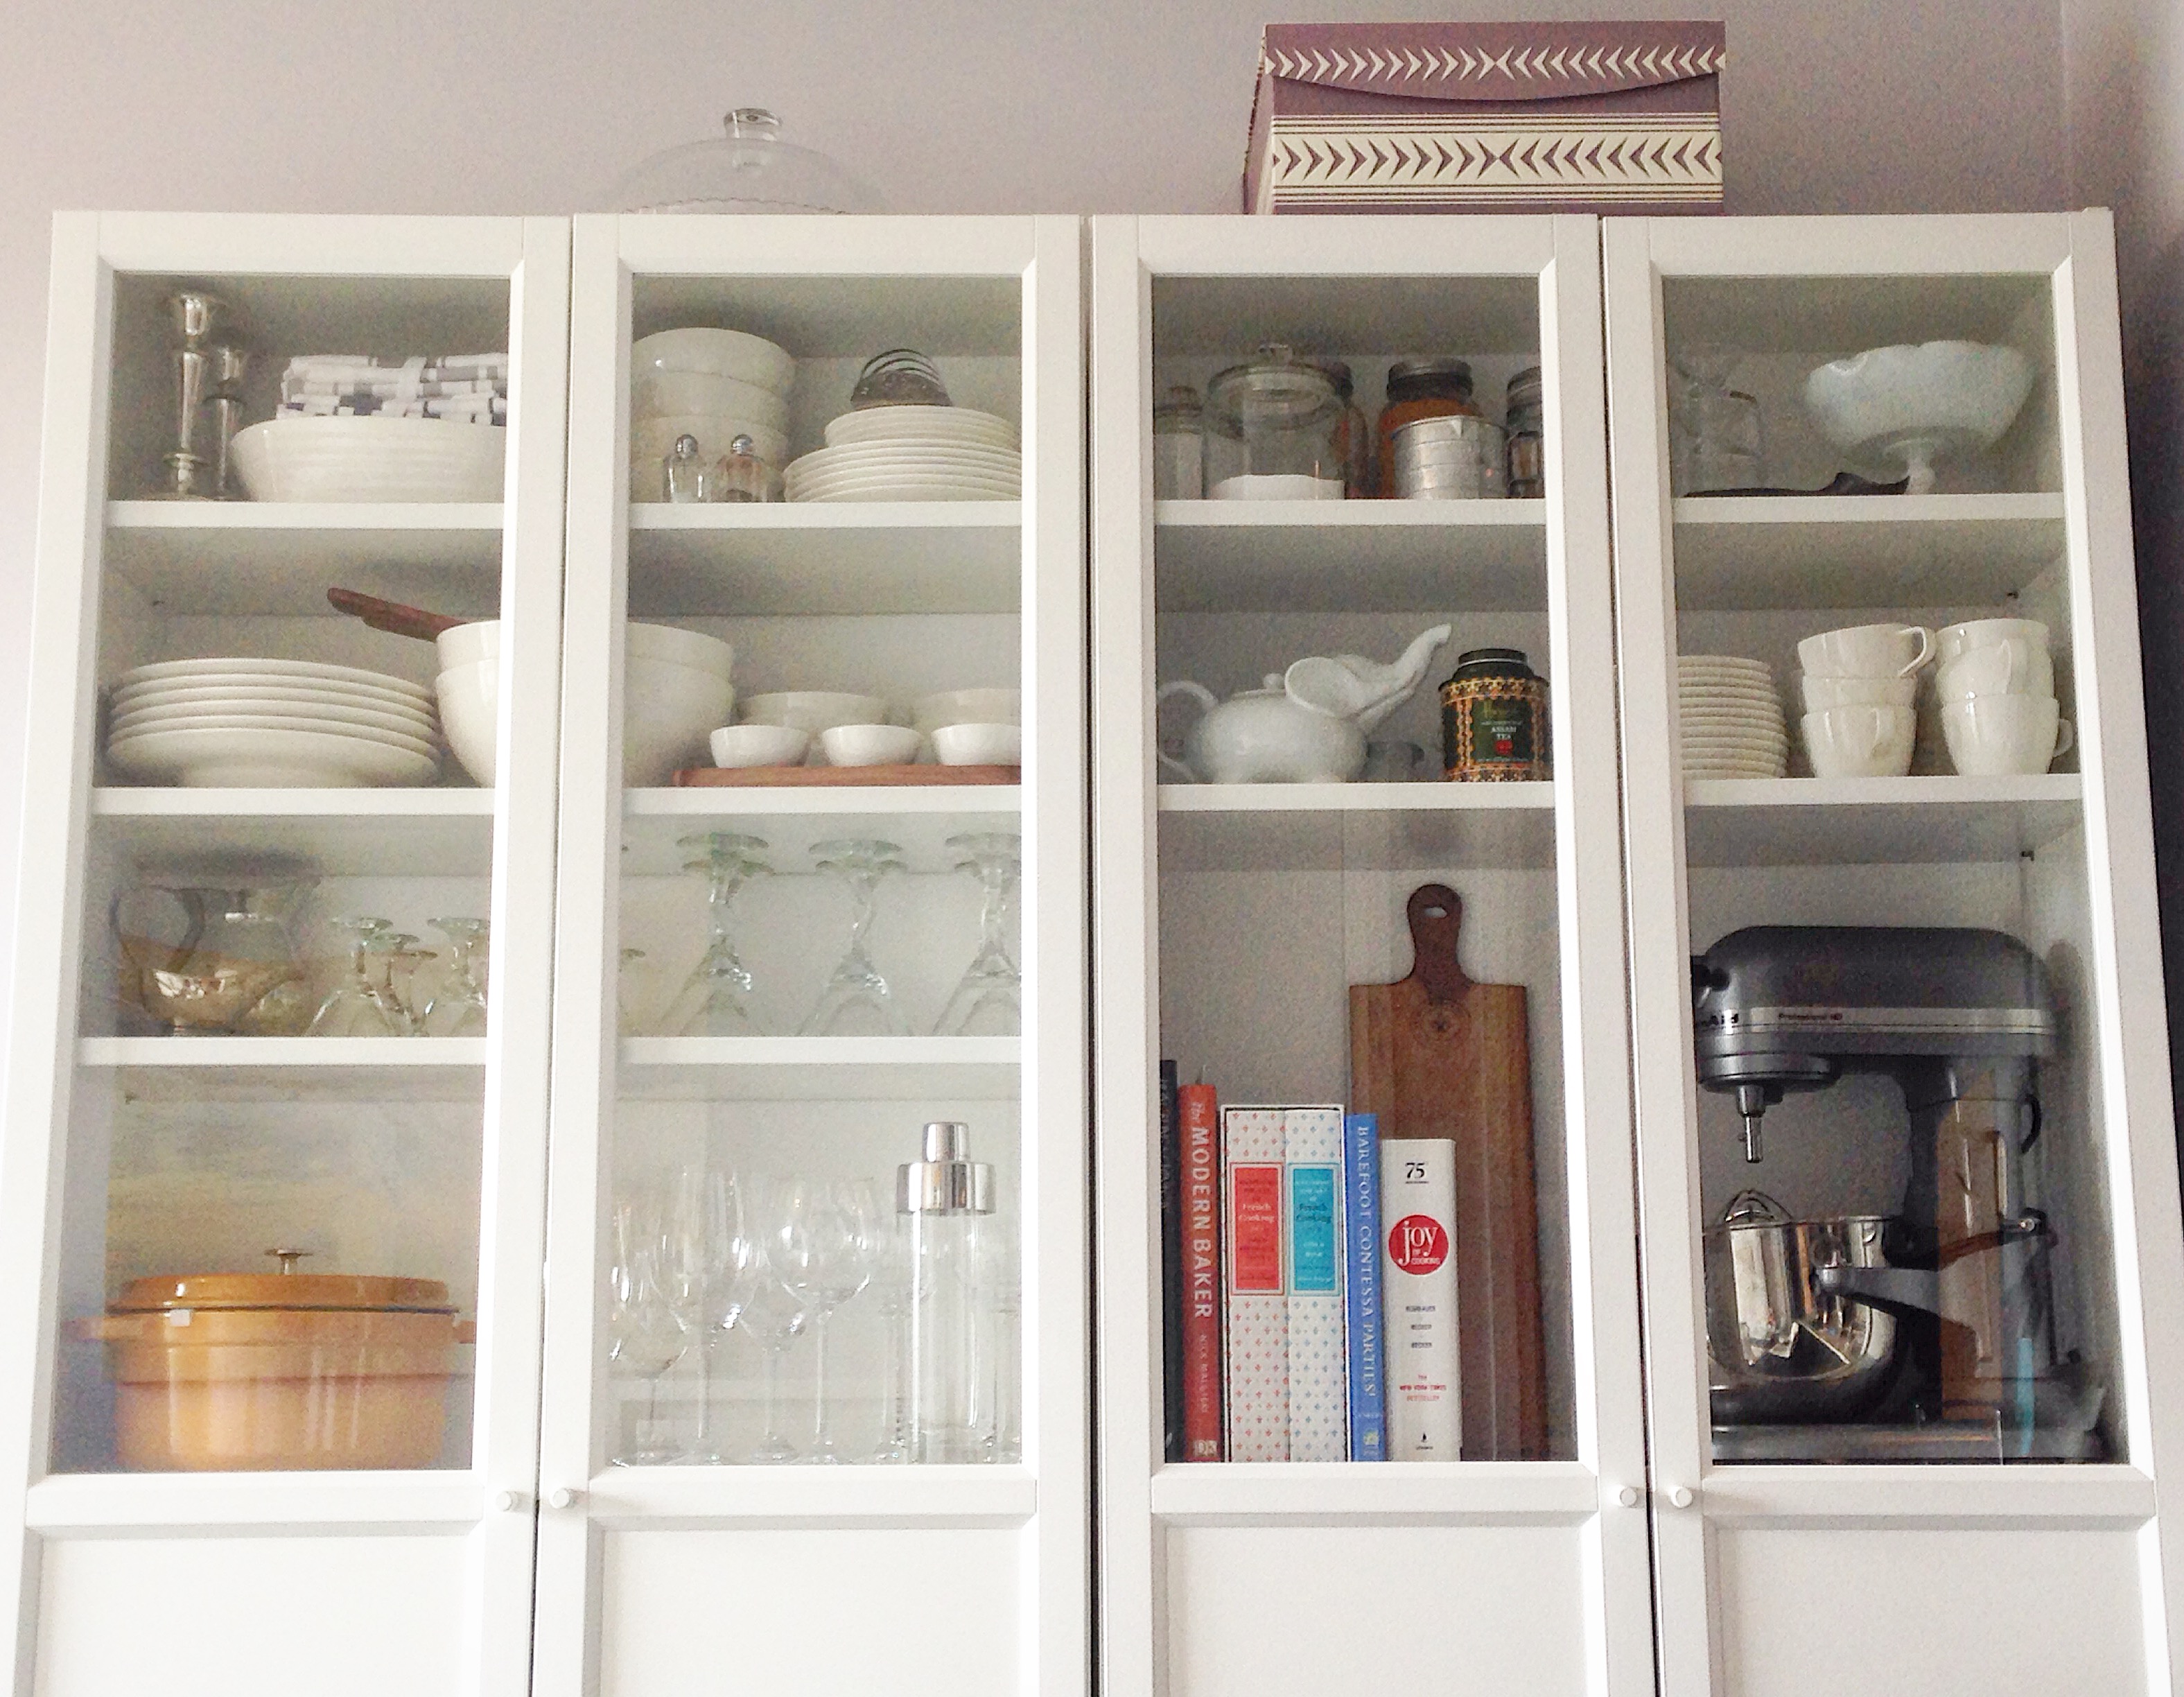
Once it became apparent that John and I would be living in our condo for longer than originally planned, I did some redecorating with storage solutions in mind. For our open concept kitchen, dining, and living area, I purchased affordable bookcases with partial glass paneled doors (see Ikea’s Billy bookcases here). I was so excited to take (some of) my beloved serveware out of storage boxes. It took some research and many tries before I was satisfied with how they were displayed, so I’m sharing some tips on how to style your dining room hutch and kitchen cabinets. I would LOVE to see photos of your arrangements!
Details of My Dining Room Display:
- The main components of my display were white and round porcelain dishes from Villeroy & Boch, Artesano Original collection.
- The three main materials that I used were porcelain, glass, and hints of metal.
- I incorporated additional texture (e.g. wooden serving pieces, fabric dish towels) and small pops of colour.
- My glassware consists of wine and martini glasses, trifle bowls, martini shaker, and storage jars.
- The metallic highlights come from salt and pepper shakers, vintage gravy boat, pitcher, martini shaker, vintage toast rack, stand mixer, candlestick holders, vintage measuring cup, vintage ice cream scoop, and the lids of some glass storage jars.
- For colour, I used a mustard yellow dutch oven. I tied it into both cabinets by placing yellow ground turmeric spice in a clear glass storage jar. I also happened to own a vintage tea tin that had a similar yellowish orange coloured pattern on it. For additional colour and added interest, I displayed a select few cooking books.
- To add some whimsy to my plain display, I included an elephant-shaped tea pot. Also, I am currently in search of the perfect pineapple “book end” for my cookbooks.
- Besides my dining room cabinets, I also have glass kitchen cabinets. I used pieces from the same dish set in both displays to tie the decor from the two rooms together and to create flow in my open living space.
How To Style Your China Hutch and Cabinets
- Inventory and Declutter
- The first step is to do an inventory of everything kitchen-related that you would consider displaying. This means emptying all of your drawers, cupboards, and cabinets.
- Take this opportunity to declutter your life by donating or selling any items that you don’t need or use. This will keep your home from looking cluttered or untidy.
- Clean Everything
- Wipe down everything either before you start, or as you work. You want your shelves dust-free, plates and bowls spotless, metallic pieces shiny, and glass pieces sparkling.
- Choose the Theme and Unifying Elements
- Take note of the colours, style, shape, and type of items in your collection.
- Decide whether you want your display to be formal (e.g. fine china and silverware) or informal (e.g. every day items). My dining room cabinet was generally informal with a handful of formal dining items.
-

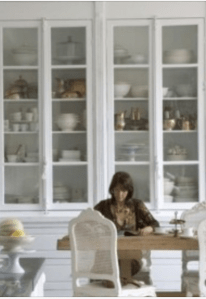
Source: pinterest.com

Source: pinterest.com
- Choose a theme and common element(s) that suit your personality and belongings. The unifying elements could be based on colour, pattern, function, shape, material, texture, and/or size. Some overall themes include: modern, contemporary, traditional, rustic, country/farmhouse, cultural, eclectic, etc.
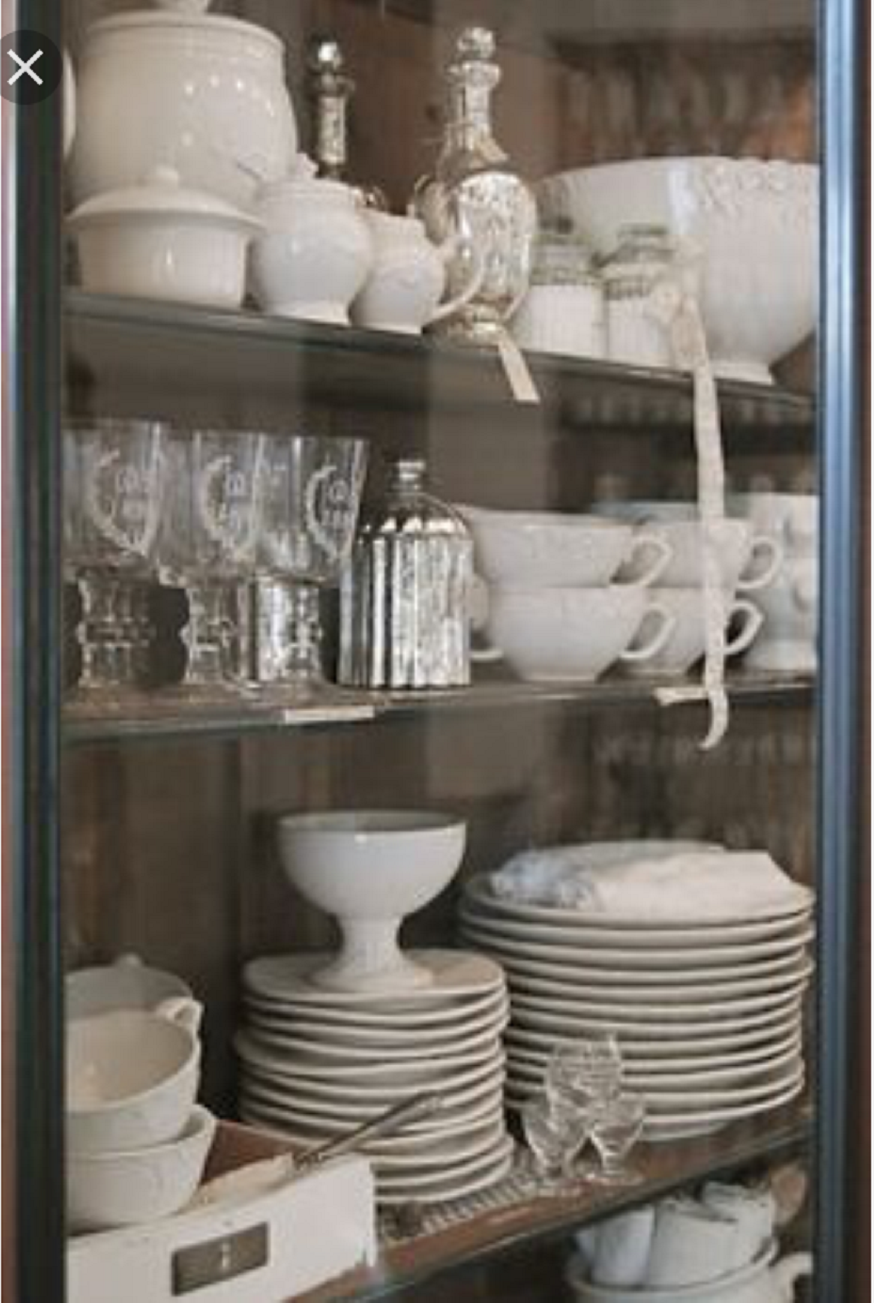
- Option 1:
- Display a single colour (monochrome) or a single pattern (e.g. blue and white china). In this case, having a contrasting, coloured backdrop would look best.
-

Source: southernhospitalityblog.com
-

Source: http://www.houzz.com
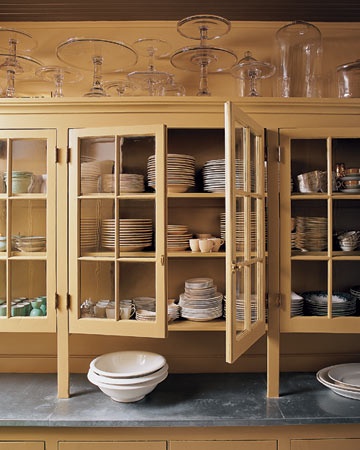
- Option 2:
- Use your hutch/cabinet to display a single type of item (e.g. glass pieces only, silverware only, plates only, or serving pieces only).
- I love how three cabinets were used in the photo below: one just for white dishes, one just for glass pieces, and the one in the middle for a combination of silverware, fabric, boxes and baskets.

Source: pinterest.com
- Option 3:
- Have a mixed or eclectic theme with varying time-period pieces, colours, textures, and types of belongings.
- You should still have common unifying elements, such as shape, function, and/or colour scheme (up to 5 colours). This is what makes the difference between an eclectic yet cohesive look that works and randomly assorted clutter.
- Texture can come from plants, metal, textiles, wooden serving pieces, books, baskets, boxes, etc.
-

Source: indeeddecor.com
-

Source: pinterest.com

Source: cityfarmhouse.com

Source: pinterest.com
- Decorate Practically (or Not)
- Option 1:
- This is a personal preference, but I wanted everything in my display to be functional and cooking/dining related. So I used what I already had and treated my kitchen stuff like decorative pieces.
- Kitchen, dining, and food-related items that you could use for display include: bottles of wine or liquor, mixing bowls, cake stands, carafes, pitchers, candle stick holders, cookware, bakeware, barware, serveware, cookbooks, folded dish towels or tablecloths, vintage-style scales, small appliances (especially vintage ones), ornate salt and pepper shakers, attractive storage jars and containers, large marble rolling pins, etc.
- Option 2:
- Another option is to add items that are purely decorative to your display. Be sure to think outside of dining!
- Use items that are fun, whimsical, unique, and personal to you. I love when displays include something unexpected.
- Go around your home and look for items that you could add to your hutch (e.g. vases, greenery, air plants or flowers, boxes, trays, decorative items or figurines, trinkets, picture frames, signs, small paintings, artwork, carvings, pottery, candles, candle holders, souvenirs, etc.).
- Change up the decorative items seasonally!
-

Source: HGTV Home
-

Source: pinterest.com
- Option 1:
- Consider Minimalism
- Decide whether you want your shelves to be filled (traditional look) or stocked minimally. When in doubt, remember that “less is more”.
- If you choose minimalism, and your piece of furniture has doors, place only one or two items or stacks per “window” of the display cabinet.
-

Source: http://www.houzz.com
- Think in Terms of “Frames”
- Before you start to place items on your shelves, divide your cabinet/hutch into sections. If your piece of furniture has open shelves, then each shelf could be considered a separate section.
- My cabinet has paneled doors, so I looked for “frames” or “windows”.
-

Source: pinterest.com
- When you start to place items on the shelves, focus on how they look within each individual window/frame.
- Then take a step back and see how the sections look in relation to each other. (See below for tips on how to create a balanced look.)
- Finally, analyse how the display looks as a whole. Adjust until satisfied (or do as I do and rearrange every few months).
- Group Items Together
- I like having a mix of standalone pieces, stacked cups and dishes, and grouped items.
- You can group items together based on similar or mixed colour, textures, shape, etc.
- Small groupings look best when:
- There are only 2 to 3 items being grouped together.
- The items are medium and large in size.
- The items have varying heights.
- You might want to group more items together if they are made of the same material (e.g. glass, porcelain/china, or silverware). You could even dedicate whole shelves to one large group of similar items.
- Remember that there are many different ways to arrange a group of items. For example, tea cups can be 1. stacked upside down or right side up, 2. stacked separately from their saucers, 3. stacked and placed on top of a stack of saucers, 4. stacked in alternating order with their saucers (upside down or right side up), or 5. hung from hooks. So play around with different options.
- Consider Size, Height, and Weight
- Large Items:
- Larger items tend to look best in hutches and cabinets. Treat grouped items and stacked items like visually large pieces.
- Don’t forget that plates, platters, and trays can be leaned up against the back of the cabinet to take up more visual space and act like large items.
- Medium-Sized Items;
- Medium sized items that aren’t large enough to standalone can be:
- grouped together with 1 or 2 taller/larger items,
- placed on either or both side(s) of a tall item (along with some shorter items),
- placed in a large group of similar items that span most or all of the shelf,
- and/or placed on top of something else for added height and interest (e.g. a decorative bowl could be placed on top of a cake stand, a box, cookbooks, or a stack of plates).
- Medium sized items that aren’t large enough to standalone can be:
-

Source: foter.com
- Small Items:
- Smaller items should not make up the focal point of any of your frames.
- Random smaller items could be used here and there as cute touches to accent larger items, stacks, or groups.
- Alternatively, you could group smaller items together and store them in decorative baskets or boxes.
- Large Items:
- Incorporate Balance, Staggering, and Symmetry
- When placing your items on the shelves, you want to take balance, flow, and symmetry into consideration.
- You could dedicate entire shelves for items of similar height, material, and/or function, but I love playing with varying heights and staggering items (and groups/stacks of items) across diagonal lines of sight.
- Note that the following guidelines can be used for arranging and balancing large/tall items, stacked items, grouped items (2 to 3 items), and similar types of items (e.g. glassware, silverware, storage jars, other decorative items, etc.).
- How to Stagger and Balance Items:
- Start by placing the largest, tallest, and heaviest items on the shelves first. Then work with your stacked items and grouped items, second.
- You want to spread out the visually large/heavy items throughout your display. I like using a zig zag pattern. You could also use these pieces to make an X pattern or a diamond pattern. Placing them at random is, of course, an option as well.
- On some shelves, you could place the tallest/largest item in the middle. For added symmetry, you could place medium height items on both sides of the middle piece, and then fill the rest of the shelf with shorter items.
- On other shelves, you could place the tallest/largest items on both ends.
- I love staggering things diagonally. On one shelf, place the tallest/largest item on one end. Then place another tall/large item on the opposite end of the cabinet on a different level.
- If you have an open shelf (i.e. no “windows”), try placing the tallest/largest item at one third of the length of the shelf.
- Then, if desired, fill the rest of the shelves with shorter objects.
- For a Symmetrical Look:
- If you prefer a more symmetrical look, start by placing/grouping the same items in all of the “frames” (or at the very least have the left and right sides of the hutch/cabinet match).
- Then add other types of belongings throughout the hutch/cabinet to make the display more interesting and warm.
-
-

Source: Love of Family and Home
-

Source: pinterest.com
-

Source: pinterest.com
-
- When you’re happy with how all of your individual “frames” look, step back and look at the display as a whole.
- Ask yourself the following questions: Is there good flow, balance, and staggered distribution of items by 1. unifying elements, 2. size, 3. height, 4. texture/material, 5. function, and 6. colour, when you look at each shelf from left to right and right to left, when you look up and down the shelves, and when you look diagonally (or zigzagging) across the hutch/cabinet?
- Use the Space Above the Cabinet (or Not)
- To maximize storage, I made use of the top of my cabinets.
- Tips for Styling Above Your Cabinet:
- Larger items tend to look best on top of your hutch/cabinet.
- Think outside of the box. You don’t have to display silverware, fine china, or serving pieces on top of your hutch/cabinet, you could display framed art work, a chalkboard, vases or pottery, baskets or boxes, a large glass cloche, cookbooks, signs, etc.
- You could place a single, over-sized item on top of your hutch/cabinet.
- Alternatively, you could display a large collection of a single type of item. For example, just cake stands or just similarly-shaped decorative vases, urns, or pottery. This works best if all items are the same colour or pattern. Also, be sure to stagger them so they have varying heights and so it looks like they have been placed a bit randomly.
-
Source: marthastewart.com
- To display different types of items:
- Ideally, you would only place 2 or 3 mixed items on top of your cabinet.
- If you want to add more, try to limit it to 1 or 2 different types of items. Also, use a simple colour scheme (only 1 or 2 colours) and consider sticking to neutrals.
- Using “lighter” materials such as glass helps, too.
- You don’t want the top of the cabinet to appear cluttered, nor do you want it to take the focus away from the items inside.
-

Source: pinterest.com
- Think Love
- The best way to arrange your belongings is to forget all of the guidelines and follow your intuition and personal taste. However you choose to display your belongings, your hutch and cabinets will look great and reflect your personality as long as you display the things that you love. It’s amazing how much joy I feel every time I see my favourite, every day things.
-
Source: pinterest.com


[…] © Cooking with Alison […]