
John is obsessed with donuts, and since I needed to preoccupy myself while recovering from a concussion, I decided to make giant donut pillows that could double as halloween costumes. I am a beginner, self-taught sewer, so if I can make this, anyone can. You could also make tiny accessory donut pillows, if preferred. The steps are the same, you just need less material.

John wore this giant donut pillow around his neck as a Halloween costume.
How to Make a Donut Pillow (DIY Craft Project)
Materials:
2 square pieces of fleece fabric for the donut, either light brown or dark brown (for a chocolate donut) in colour (Note: I used 1.5 metres x 1.5 metres to make a giant donut pillow)
1 square piece of fleece fabric for the frosting in white, dark brown (for a chocolate glaze) or any fun colour that you like (Note: I used 1.75 metres x 1.5 metres in the colour pink or purple. Also note that this piece should be slightly larger than the pieces of fabric that will be used for the donut.)
small 10 centimetre wide strips of fleece fabric for the sprinkles in different colours (I used bright pink, purple, yellow, blue, green, and white)
stuffing material (I needed 6 litres (96 ounces) to lightly stuff my donut.)
needle and sewing thread (Note that the sewing thread that you use to attach the frosting to the donut will be visible, so try to find a colour that either matches the frosting or contrasts it nicely.)
craft glue for fabric (if you do not want to sew each of the sprinkles to the donut)
sharp scissors
marker
Instructions:
Please note that from here on, when the instructions refer to the bottom side of the fabric, they will be referring to the underside or the side of the fabric that will not be seen once the donut pillow has been completed. The top side of the fabric will be referring to the side of the fabric that will be seen (and will end up being on the outside of the pillow) once the donut pillow has been completed.
Step 1: Draw an outline onto the fabric.
Work with one piece of fabric at a time. Be sure to place the fabric with the bottom side facing up and only make markings on the bottom side of the fabric. Starting with the two pieces of fabric that will be used for the donut, use a marker to draw an outline of where you are going to cut the fabric. Each of these two pieces of fabric will need one large circle with a small circle in the middle of it drawn out for the donut shape. Make sure that the size of the circles are the same across both pieces of fabric. Depending on the size of your donut, there are a few options for how you can draw the outline:
- You can find round objects around the house and trace them onto the fabric, i.e. round jar bottoms or lids, buckets, garbage cans, etc. Do this for both the small and the large circles of your donut.
- You can mark the centre of the piece of fabric using a marker and then use a ruler to measure out your desired length (i.e. desired size of the donut and donut hole) from the centre point of the fabric. Use a marker and make a dot at the point of your desired length. Then repeat this step, always starting from the centre point and always using the same length, all the way around the centre point until you have a complete dotted circle outline. Do this for both the small and the large circles of your donut.
- You can use a piece of string to tie two markers together. One of these markers will be placed, standing up, on the centre point of the fabric and will not move. The other marker, which is attached to the stationary marker by string, will be held standing up while pulling the string taut and used to draw marks all the way around the centre point. This will create the outline of a circle. Just make sure that the distance between the two markers creates your desired size for the donut and donut hole. This is the method that I used to make a giant donut pillow.
Next you will need to draw the outline of the frosting. Use the piece of fabric that you have designated for the frosting and place it bottom side facing up. Draw out a circle in the middle of the piece of fabric that is slightly smaller in diametre than the size of your donut hole. Then draw the edges of the frosting using asymmetrical, irregular, and wavy, lines all the way around the fabric. Ideally, you will have at least one section of the frosting that will overlap the seam line of the donut. This will look like frosting that has dripped down the sides of the donut and will help to cover up the parts of the donut that will be hand-sewn.
Step 2: Cut the fabric.
Using a large pair of sharp scissors, cut out the inner donut holes and cut out the outer donut circles from the two pieces of fabric that will be used for the donut. Then cut out the donut hole and wavy pattern from the piece of fabric that will be used for the frosting. Finally, cut out as many sprinkles as you would like. They should be rectangular in shape and the edges can be curved or square, depending on what you prefer. For my giant donut pillow, I made my sprinkles approximately 3 to 4 inches long and under 1 inch wide and I gave them curved edges.

Step 3: Pin the donut fabric together.
Work with the two pieces of fabric that will be used for the donut. Lay out one of these pieces of fabric on the work surface with the top side facing up. Smooth it out so that it is perfectly flat. Then place the other piece of fabric directly on top of the first piece with the top side facing down. Once again, smooth out the fabric so that it is perfectly flat. The two pieces of fabric should be very close to identical. Right now, both of the top sides of the fabric should be touching each other and the bottom side of one piece of fabric should be facing up where the bottom side of the other piece of fabric is facing down. Use sewing pins to pin the two pieces of fabric together along the outer edge and along the inner donut hole.
Step 4: Sew the pieces of donut fabric together.
Using a sewing machine set to the solid zig zag pattern, sew the two pieces of donut fabric together along the outer edge of the larger circle. Sew close to the edge of the fabric. Remove the pins as you sew towards them. Do not sew all the way around the circle. Be sure to leave an opening that is large enough for you to easily put your hand and a handful of stuffing through.
Then flip the donut fabric inside out so that the top sides of both pieces of fabric are now on the outside and the bottom sides of both pieces of fabric are now touching each other on the inside. Use sewing pins to pin the fabric pieces back together, this time along the inner circle (i.e. donut hole).
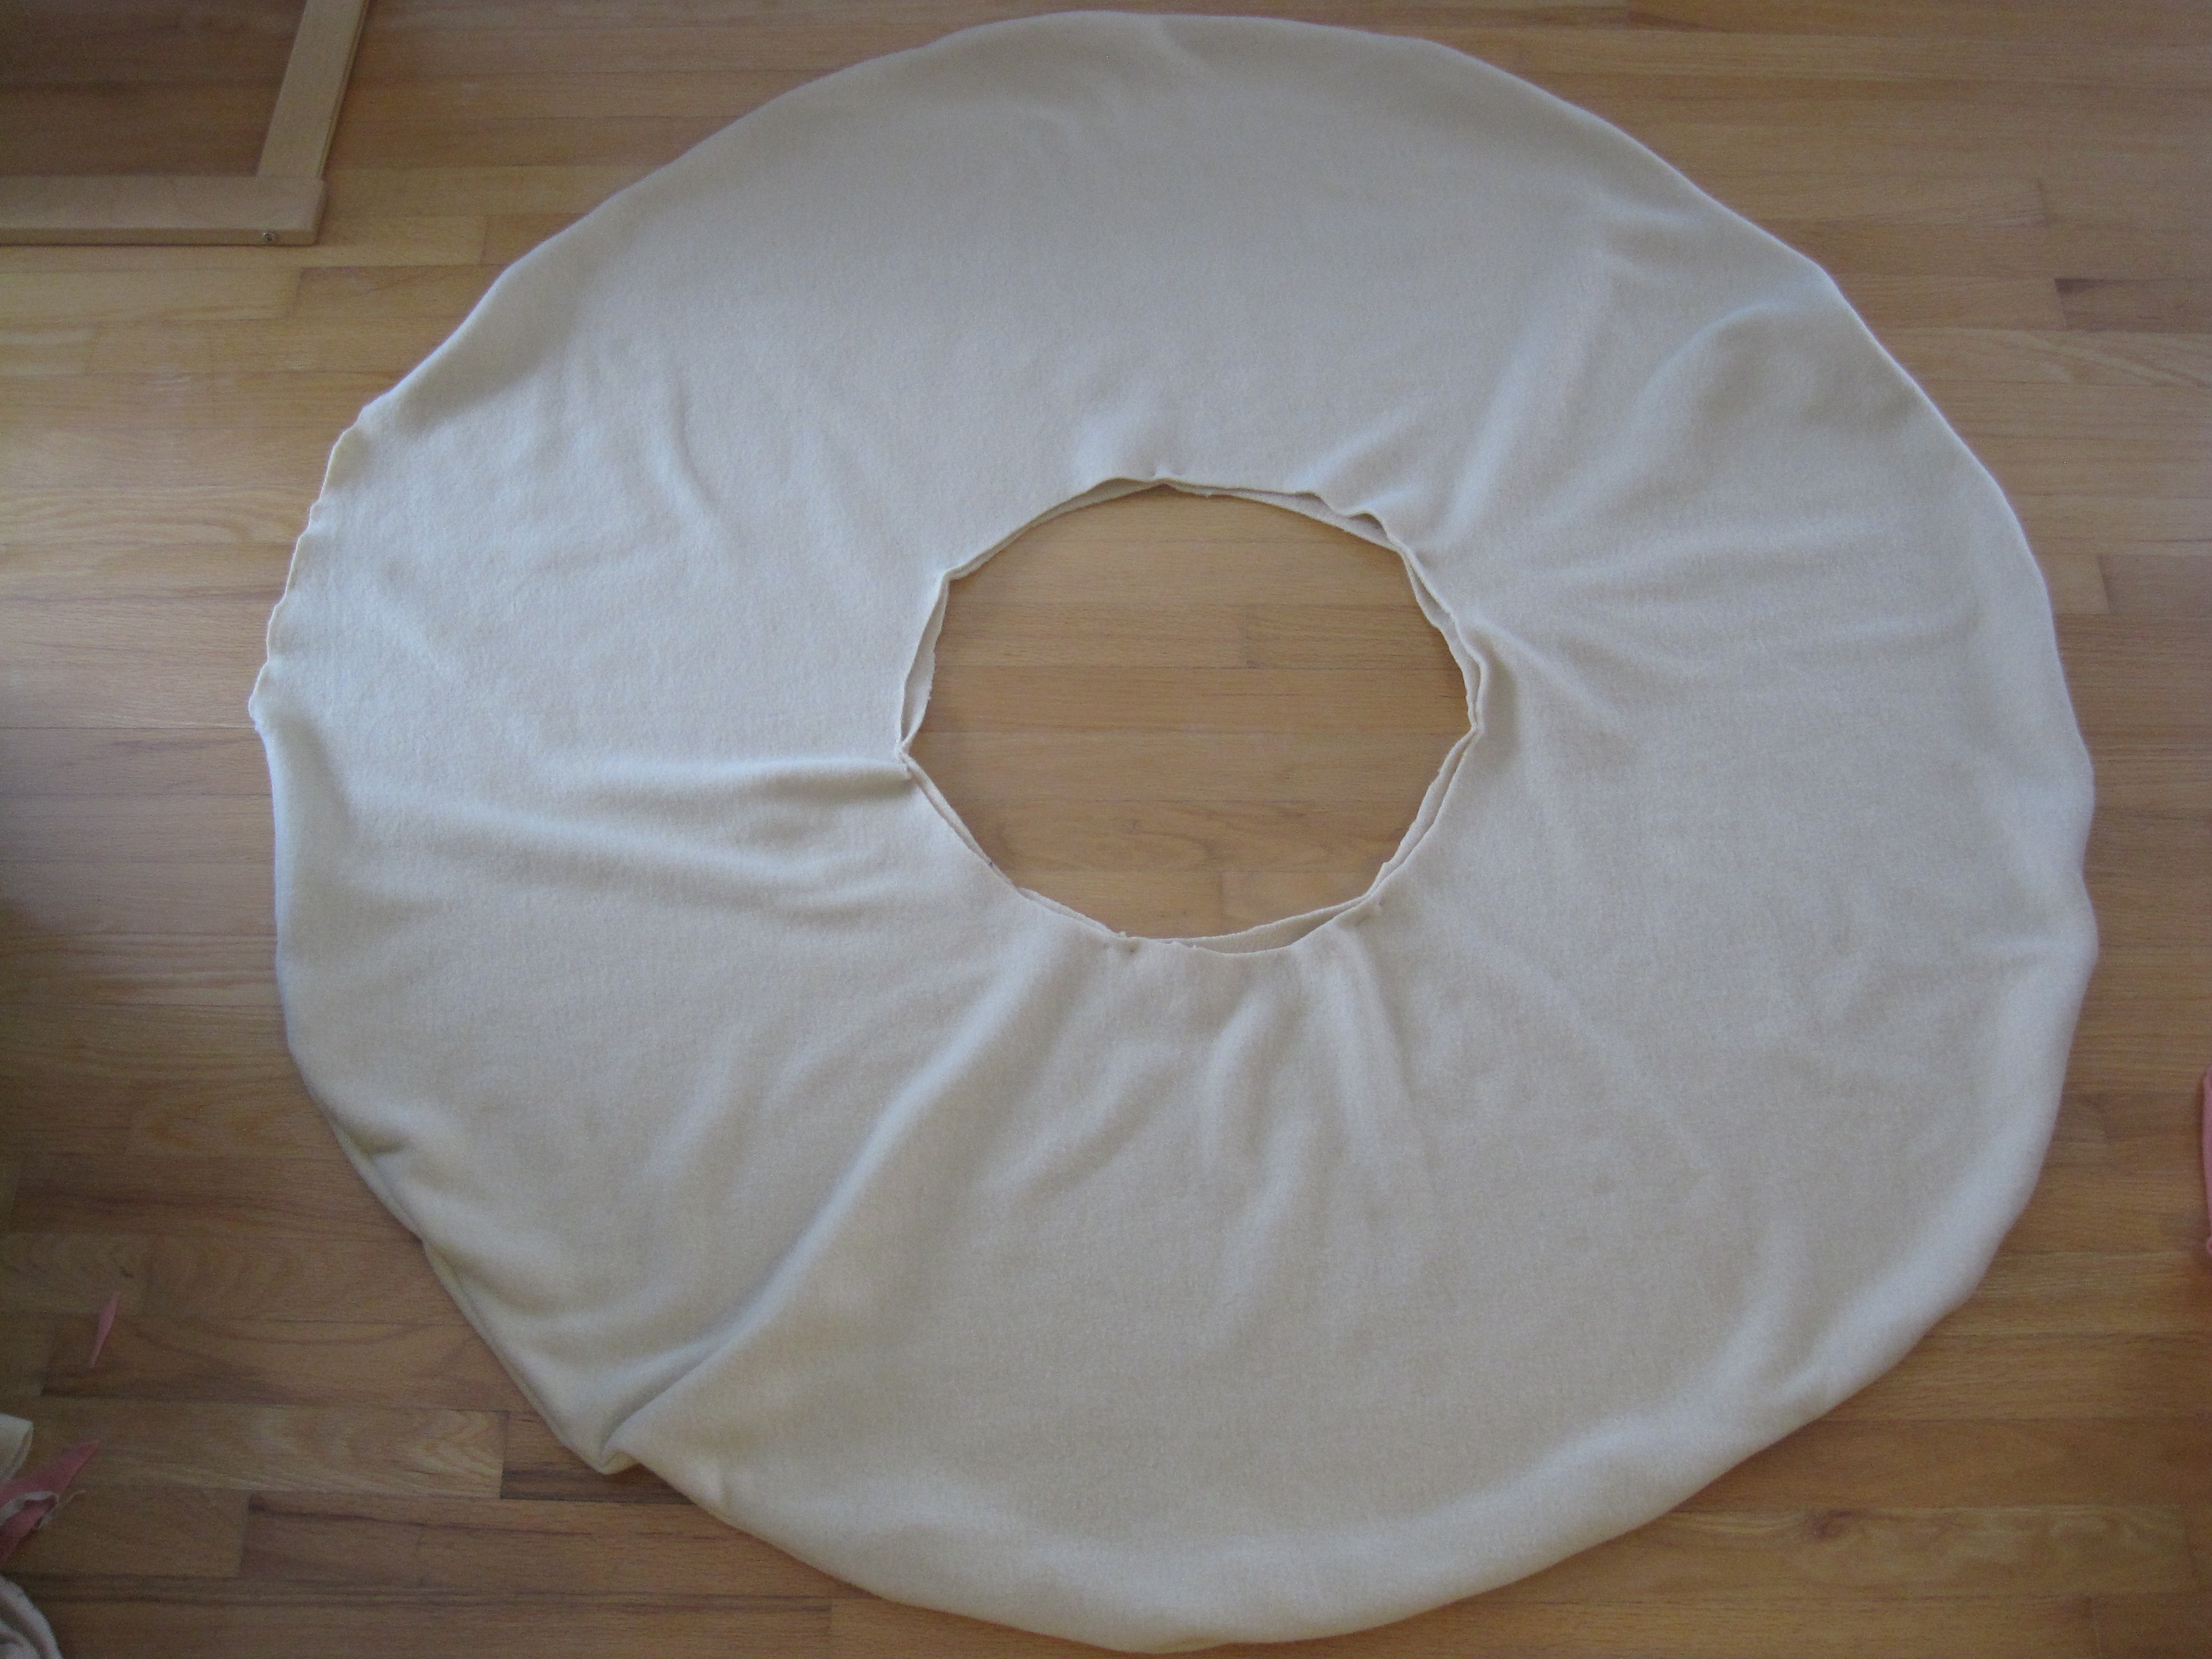
Then use the sewing machine, set to the solid zig zag pattern, to sew the two pieces of donut fabric together along the inner donut hole. Sew as close to the edge of the fabric as possible. Sew all the way around the circle. Cut off any excess fabric. This stitching will not be seen when the donut pillow is finished, because the frosting will overlap the stitching along the inside of the donut hole.
Step 5: Stuff the donut pillow.
Use your hands to grab handfuls of the stuffing material and push it into the donut pillow through the opening that you left when you were sewing along the outer edges of the donut. Be sure to push an even amount of the stuffing all throughout the donut.

Step 6: Sew the donut closed.
Use a needle and thread to hand-stitch the opening of the donut pillow closed. This hand stitching will not be seen on the finished product, because the frosting will overlap this section of the donut.
Step 7: Sew the frosting to the donut.
Place the piece of fabric that is designated for the frosting on top of your donut pillow. Make sure that the top side of the frosting fabric is facing up. Also make sure that the frosting is lined up so that one of the longer waves of frosting covers the seam of the donut pillow that you hand stitched. The inner circle of the frosting fabric should also cover the stitching inside the donut hole of the pillow.
Use a needle and thread to hand-stitch the frosting fabric to the top of your donut pillow. I just used a simple whip stitch. Start by attaching the inner circle of the frosting to the donut hole. Be sure to sew it together, all the way around. Then attach the outer edge of the frosting to the donut pillow. Once again, I just used a simple whip stitch. Once the entire piece of frosting fabric has been sewn to the donut pillow, add the sprinkles.
Step 8: Attach the sprinkles to the frosting.
If you have small children or pets, then I would recommend taking the time to hand-sew each of the sprinkles to the frosting on your donut pillow. This will help to prevent the sprinkles from being ripped off.
A less time consuming option is to simply glue the sprinkles (top side of the fabric facing up) to the frosting fabric on your donut pillow. I suggest first deciding where you want to place the sprinkles, laying them out on your frosting, and then gluing them down one by one. Allow the glue to dry.
Your donut pillow is now ready to be worn as a costume, or enjoyed as an accessory, pillow, or decoration.

Wonderful idea! I WANT a donut pillow! 🙂
I tried (and failed) at winning one in those amusement park games a bunch of times… 😦
Love,
Isabella
hahaha 🙂 Now you can make as many as you want 🙂 Thanks so much for your comment 🙂
[…] (called SuperMe) that doubles as a fleece pillow. And if you’re crafty, I love the idea of donut pillows for playrooms that can double as […]